If you don’t know how to use Photoshop you have come to the right place. We will cover how you can use photoshop based on the basics of photoshop.
If you have prior knowledge about how to use photoshop, but don’t have the basic knowledge of photoshop. You can increase your knowledge of basic photoshop from this article.
Summary of this article:
- Introduction to Interface
New file, Menu bar, Tools, Panel, Layers, Pallets.
- Working with images
- Export and Import
Introduction to Interface:
We assume that you are not familiar with how to use photoshop. When you start adobe photoshop you will see this home screen:
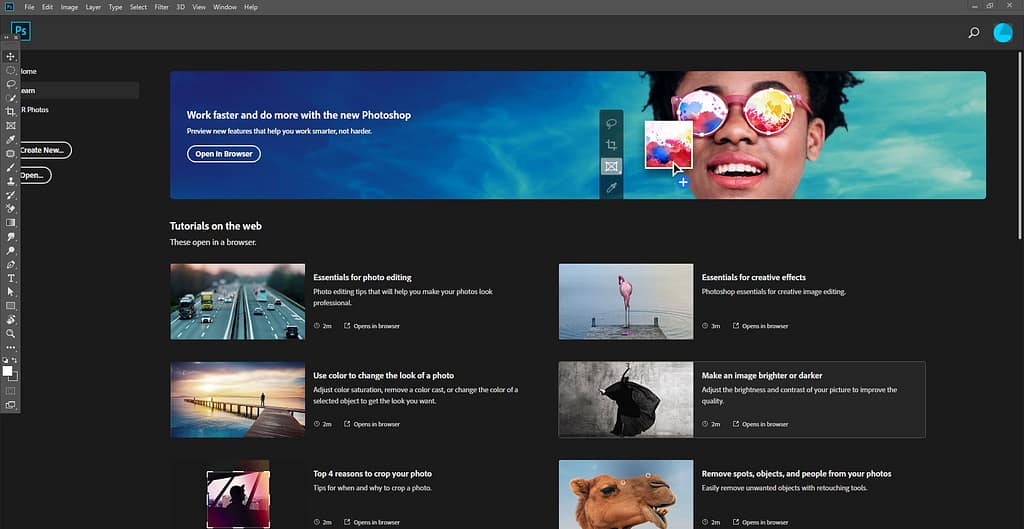
No need to worry, you will see some menu on the upper section like File, edit, image just click on the file menu. Then a menu will popup with lists of submenu. Click to the New like below image:

After clicking on new a document will open like below image:

Here Marked up some points you may see in this images. Let us explain all this things.
Width Defines what will be the width of your document. Your required width should be placed here.
The width and heights are actually the dimensions you need for your work. You may see an option called pixel. We will use pixel on this tutorial. You can use inches, centimetres, millimetres, points picas. Orientation icon represents portrait and landscape. Resolution used to control how large or small image will print. We will set it up to 72 pixel/inch. Color mode used to RGB for screen and CMYK for print. It depends if you creating projects for print you should select CMYK. If you doing projects for screen then RGB. We will continue with 8 bit.
You can save your settings on presets. On the top tabs, you will find your saved presets along with different built-in presets like photo, print, art and Illustration, web, mobile film, and video.
Press the create button and your document will be ready for work.
Introduction to Menu:
If you check the top of the photoshop you will find a list of menus. File, Edit, Image, Layer, Type, Select, Filter, 3d, view, window, Help. They do help you with a lot of options in the submenu. Every menu has different options available. We will go through the options below.
File : File menu is used to create new files, open your existing files, open your recent files, close files, saving your files, embed files, import and export as your requirement, print. Here is an option available to share your work on Behance. More features are available on this menu.
Edit : Edit menu gives you access to cut, copy, paste, undo, redo, transform, warp, fill, stroke, presets, color settings, assign profile, keyboard shortcuts, brush presets, toolbars, etc. With preferences, you can modify general, history, workspace, guides all of this as your comfort. You can change a lot of things from this preference.
Image : If you forgot any settings to create a new file, you can modify those things here. Like changing CMYK to RGB or grayscale. 8bit to 16bit. All of the image adjustments can be found in this menu. Brightness, curves, levels, hue/saturation, black and white, shadow/highlight, etc. You can change your image size or canvas size. Also, image rotation available. You need to check personally check what you need.
Layer : In this menu, you can do all kinds of edit, update, add on layers. If you don’t know what is layer. We will describe it below. You can copy CSS, SVG codes from this menu, which will help you to code faster or extract code positions or SVG code faster. You can clipping mask, group layers, merge layers, rasterize, arrange, hide, and lock layers.
Type : Type menu is usually for font and text properties. You can add fonts from Typekit, update fonts, replace missing fonts, load fonts. You can rasterize font layers.
Select : This menu provides selection properties like select, deselect, inverse, reselect from this menu. You can find layers, isolate layers, select layers, isolate layers. You can modify layers using feather, expand, smooth, border, contract. Select and mask, color range, transform selection, load selections are available on this menu.
Filter : Filter menu gives you all the access to filter properties on this menu. Starting with blur, 3d, noise, distort, pixelate, render, stylize, etc properties can be found here. If you need to blur your image or need to ad noise you can use these properties to achieve your requirements. Every property has sub-menus that gives you access to lots of features.
3D : By the name of this menu you understand that this menu works for 3d properties. Making 3D layers, new mesh layers, grouping objects, generate UVs, render 3D layers, 3D paint and a lot of features are available in this menu.
View : View menu gives you access to view the properties of the document. Zoom in and out, fit on screen, showing grids, locking grids and slices, clear grids and slices, showing rulers are available to this menu. You can change screen modes to full screen, proof setup, pixel aspect ratio, snap to different properties like layer, guides, grid, etc.
Window : Window menu holds all of those properties which gives you access to all panels and options. Giving you the properties of arranging your documents to different layouts. You can 2-6 up horizontally and vertically arrange your layouts of the document. You have the flexibility to choose your workspace as your requirements. Essential, graphics and web, 3D, painting, motion, photography preset are already available in this menu. You can customize your workspace as you want. All of the panels are here you need to click to avail in the document like 3d, character, color, brush settings, action, path, paragraph, etc. All of your open documents can be select at the bottom of this menu.
Help : This menu gives you access to photoshop help, tutorial, about photoshop, about the plugin, manage your account, system info, and updates. Photoshop basics also can be found in here.
Tools:
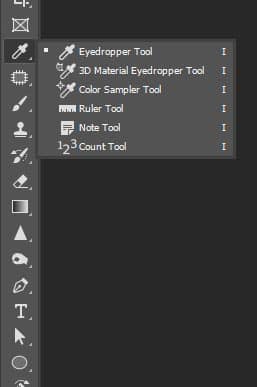
After opening your photoshop, the tools panel appears on the left of your screen. like below image:

Some options are hidden in this tool, a small triangle symbol tells this has some hidden options. you need to click options that will be available to work.
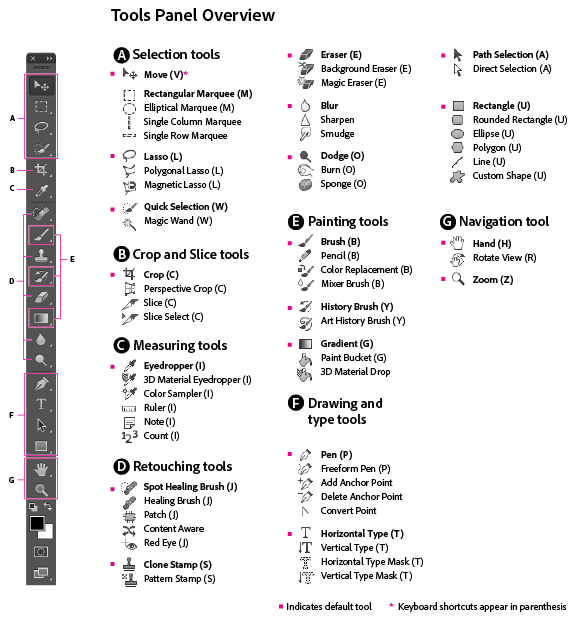
A tool panel overview is in the below image:
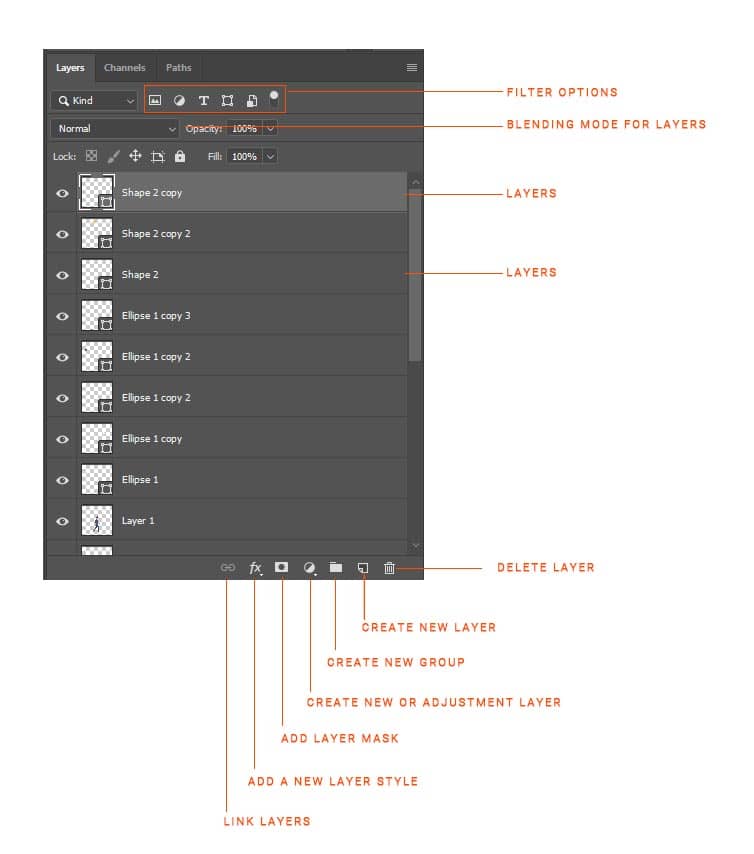
Panel: Panel gives you access to all kinds of options and commands. There are different panels for different options. what you need to open these options from the Window menu if it’s not available on the document. Panels are grouped together to use the space on the document. Related panels can be found next to each other. You need to click on the individual panels to view. In the below image the marked portions are the group panel
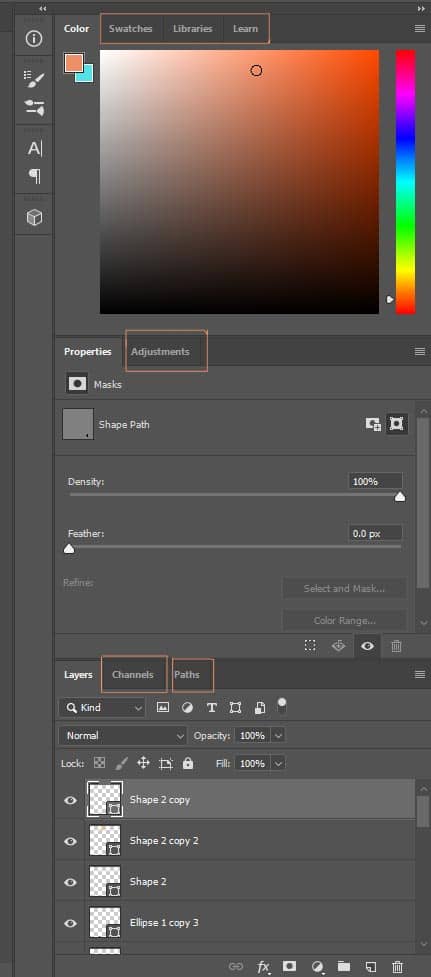
Layers: Layers panel is one of the most important to work with photoshop. Here you can add a layer, delete a layer, create a new group, create new adjustments, add layer mask, new layer style, link layers. In the top you will find blending mode for layer options, from here you can add blending styles for your layers. There is opacity and fill available, you can increase or decrease these values as your need. Filter options are available for filter smart objects, text, images on this layer panel.
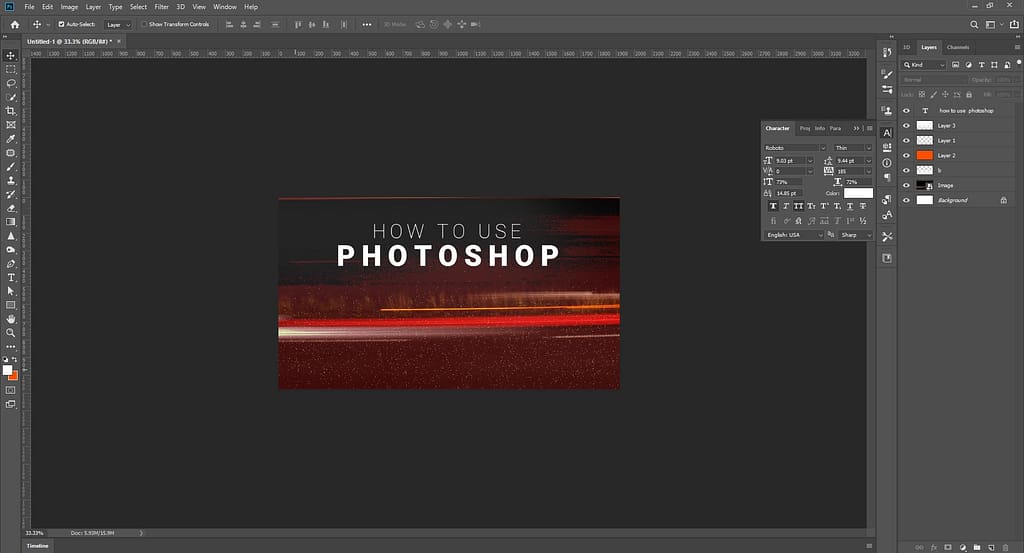
Working with images: We have created this design using importing the background image, then added a color layer which changes the color theme on this image. After that two font-weight texts added to the document, as you see we changed the size of these texts and positioned like this. Slight color brush effect used in this design.
And the final output is here:
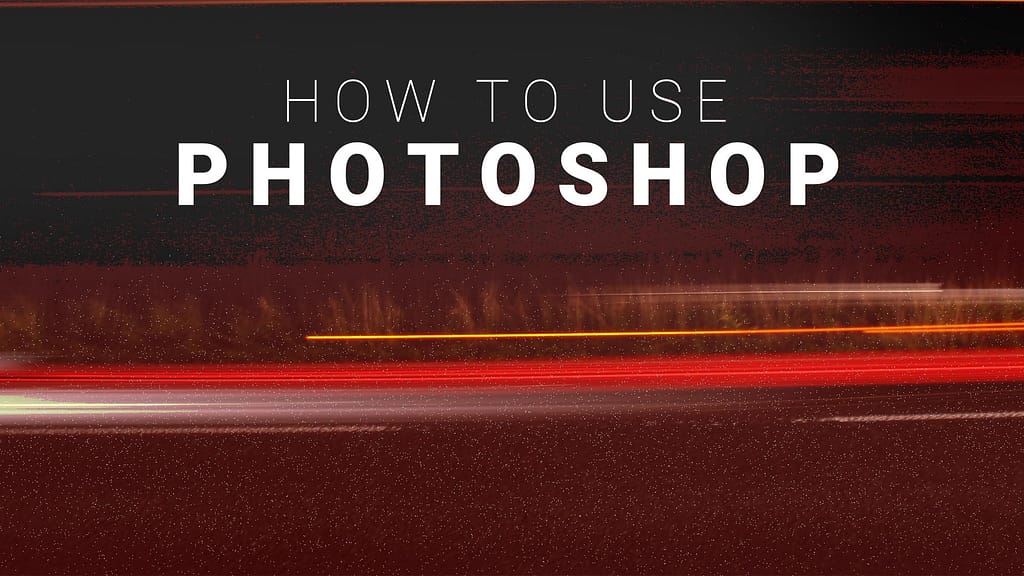
Export and Import: In the file menu you will get the import and export options. You can import video frames to layer, notes. If you need to import images or something you can place embed on the file menu. To export your output go to file menu > export, you will find a lot of options as your requirement. We have created a simple design with a headline with how to use photoshop. A text added with an image and some adjustment, that’s it. If you need this tutorial let us know in comments.
Thank you for your time. Hope you liked it. We will bring more and more tutorials on adobe Photoshop.
Design need beautiful images. we have written an article about free stock photo sites. If you’re interested please visit: 21 Best Free Stock Photo Sites for your Design


Pingback: Top 15 Free illustrations for your design project completely royalty-free. - Codes And Design
Pingback: 19 Best Websites To Download Free Icons For your personal use - Codes And Design
Pingback: Best 30 Photoshop Text Effect Tutorials that saves your time. - Codes And Design
Pingback: andere.strikingly.com